A loose garden hoe handle can turn ordinary digging into an unsafe, frustrating task. Each swing transfers force through the wooden shaft, while a small gap near the socket grows with repeated use. Learning How to fix a loose wooden handle on a garden hoe helps restore control, reduce hand strain, and extend the tool’s useful life.
This guide explains practical repair methods used by experienced gardeners and tool maintainers. You will learn how to inspect the eye, tighten the wooden handle, and secure it with a suitable wedge. The process requires patience, a sturdy work surface, and basic tools such as a mallet, rasp, and replacement wedge. Check the wood carefully for splits, soft areas, or crushed fibers. A handle may look sound but still hide damage near the metal head. Do not ignore that detail.
I have found that forcing a dry handle tighter often creates a temporary repair. It may feel firm today, then loosen after several digging sessions. A properly fitted handle should sit deeply and evenly inside the hoe head. The wedge must expand the wood without cracking it. Work slowly. Small adjustments matter.
This introduction also addresses when repair is sensible and when replacement is safer. If the shaft has a deep crack, severe rot, or a badly damaged eye, replacing the handle is usually the dependable choice. A secure hoe should feel balanced, quiet, and stable during use. That simple test can reveal more than appearance alone.
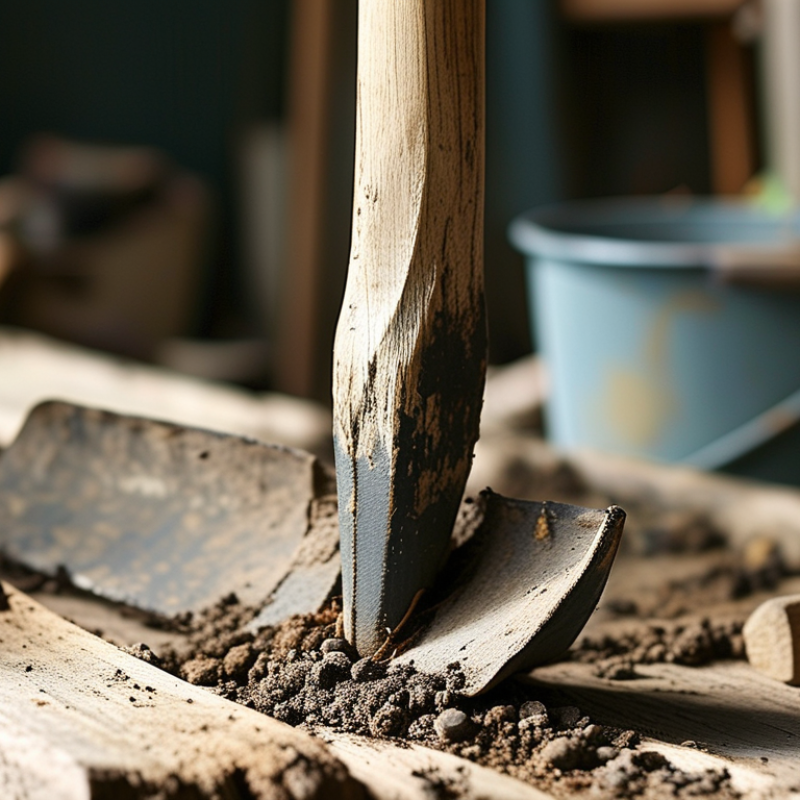
A loose wooden hoe handle usually signals a fitting problem, not simple age. Inspect the tool before repairing it, as OSHA’s hand and power tool guidance recommends checking handles for cracks, splits, and poor attachment. Hold the hoe head firmly and move the handle sideways. If the head rocks, examine the wooden wedge and the eye, the opening through the metal head. A missing wedge, shallow seating, or an oversized opening can create movement. Do not ignore small cracks near the shoulder.
Moisture changes often explain the looseness. The USDA Forest Products Laboratory’s Wood Handbook reports that wood shrinks and swells below its fiber saturation point, commonly around 30% moisture content. A dry shed can shrink the handle around the metal eye. Repeated wetting may then enlarge gaps through swelling and drying cycles. Look for a polished contact area, crushed fibers, or a visible gap under the head. Those marks reveal movement during use. They are easy to miss.
Impact damage is another cause. Striking hard soil, roots, or stones can compress the handle end and loosen the wedge. A careful repair begins with removing the head and checking whether the wood remains solid. I once treated a loose handle as a wedge problem, but the shoulder had already split. That mistake wasted time. If the eye is distorted or the handle is deeply cracked, replacement is safer than adding adhesive. A sound handle should fit tightly, sit straight, and resist hand pressure without clicking.
Before repairing a loose wooden hoe handle, gather every tool within reach. You will need work gloves, safety glasses, a bench vise, and a wooden or rubber mallet. Add a flat punch, screwdriver, coarse sandpaper, and a small rasp. A measuring tape helps check the handle’s fit inside the metal eye.
Prepare a dry hardwood wedge sized for the handle slot. Keep a thin metal wedge available if the original design uses one. Wood glue may help stabilize small gaps, but it should not replace a properly fitted wedge. Choose a suitable replacement handle if the existing wood shows deep cracks, soft spots, or crushing near the hoe head. Inspect closely. Small damage can become dangerous during hard digging.
I usually place an old towel beneath the hoe head while clamping it. This protects the finish and reduces slipping. Keep a waste container nearby for broken wedges and dust. A flashlight reveals hidden splits around the eye. I once skipped that inspection and missed a narrow crack near the shoulder. The handle felt secure for one afternoon, then loosened again. That mistake changed my preparation. Measure twice. Sand slowly. Avoid forcing a wedge into uneven wood. A clean fit matters more than using extra adhesive.
A loose wooden handle can make a garden hoe unsafe and difficult to control. I have repaired several hoes, and the first step is always removing the handle completely. Wear gloves and eye protection before working. Place the hoe head on a stable wooden block. Tap the exposed end of the handle with a wooden mallet, moving slowly. Avoid striking the metal edge directly. If the handle will not move, drill a few holes into the broken wood and split it carefully with a narrow chisel. Do not rush this part.
Once removed, inspect the hoe head under good light. Check the eye, the opening that holds the handle, for cracks, distortion, or heavy rust. Run a cloth through the opening. Sharp burrs can damage a replacement handle. My first inspection was too quick, and I missed a small split near the eye. That mistake caused another loose fit later. A slightly bent head may need professional repair rather than force. Do not use a damaged hoe head.
Tips: Clean loose rust with a wire brush, then wipe away all dust. Measure the eye and compare it with the new handle. The fit should be firm, not forced. If wood fibers crumble inside the eye, replace the head. Keep the removed handle for comparison. It often reveals where movement began.
Removing the loose wooden handle before inspection helps reveal whether the hoe head has a worn eye, cracks, rust, or damaged mounting surfaces. The times shown are practical estimates for a typical hand-tool repair and may vary with rust, wood condition, and fastener type.
2026 Best How to Fix a Loose Wooden Handle on a Garden Hoe?
A loose hoe handle usually needs more than a quick hammer tap. Remove the hoe head and inspect the wood for cracks, rot, or crushed fibers. Replace the handle if the damage reaches deep into the shaft. A repair cannot make weak wood dependable.
Clean the socket and sand away packed dirt. Test the handle before adding adhesive; it should enter firmly but not split the metal eye. Apply a small amount of durable, moisture-resistant wood adhesive inside the socket. Slide the handle fully into place, then drive a hardwood wedge into the top of the handle. Add a second cross wedge only if the design allows it. Too much force can deform the eye.
Tips: Let the adhesive cure according to its instructions, even when the handle feels solid. Wipe away excess glue before it hardens. I would also mark the handle position with a pencil. That small detail helps reveal movement later. My first instinct used to be tightening everything aggressively, but that can create hidden cracks. After curing, grip the handle and pull gently in several directions. Stop if you hear creaking. A loose wedge, split wood, or shifting head means the repair needs another inspection before garden use. Keep the tool dry between uses, because repeated moisture can loosen both wood fibers and adhesive.
| Step | Repair Dimension | Recommended Data or Method | Why It Matters | Completion Check |
|---|---|---|---|---|
| 1 | Initial Safety | Wear safety glasses and work gloves. Place the hoe head on a stable work surface and keep the cutting edge pointed away from you. | A loose head can move unexpectedly, while cleaning and driving wedges may create flying wood or metal particles. | The tool is stable, the work area is clear, and the blade cannot contact your hands. |
| 2 | Inspect the Handle | Replace the handle if it has a deep split, crushed fibers, severe rot, or a sharp bend. A slightly loose but structurally sound handle can usually be reset. | Adhesive and wedges cannot reliably restore wood that has lost significant strength. | The handle is straight enough for use and has no structural damage near the eye or grip. |
| 3 | Remove the Old Handle | Remove the hoe head and pull or carefully cut out the existing handle. Do not strike the metal eye directly with a hardened steel hammer. | Direct steel-on-steel impacts can damage the eye and create metal fragments. | The eye is free of loose wood, old wedges, dirt, and hardened adhesive. |
| 4 | Clean the Metal Eye | Use a wire brush, scraper, or coarse abrasive paper to remove residue. Wipe away dust and allow the surfaces to dry completely. | Clean, dry contact surfaces improve the fit and help adhesive bond consistently. | No loose rust scale, grease, dirt, or sawdust remains inside the eye. |
| 5 | Check Handle Fit | Insert the wooden handle through the eye from the correct direction. The shoulder should seat firmly against the eye without a visible rocking gap. | A proper mechanical fit carries most of the working load; adhesive should supplement the fit rather than replace it. | The head is aligned with the handle and cannot wobble when lightly twisted by hand. |
| 6 | Prepare the Wedge Slot | If the handle has no slot, cut one centered along the handle axis at the top end. Keep the slot straight and stop before it reaches the shoulder. | A centered slot allows the wedge to expand the wood inside the eye instead of splitting the handle unevenly. | The slot is centered, clean, and does not extend into the shoulder area. |
| 7 | Choose the Wedge | Use a dry hardwood wedge sized for the slot. The wedge should be long enough to fill the slot but should not protrude excessively above the handle. | A properly sized wedge spreads the handle against the inside of the eye and reduces movement. | The wedge fits snugly in the slot and does not require excessive force to start. |
| 8 | Apply Adhesive | Apply a thin, even layer of a moisture-resistant wood adhesive to the handle surface inside the eye and to the wedge faces. Avoid filling the entire eye with adhesive. | A thin bond line reduces voids while preserving the mechanical expansion provided by the wedge. | The adhesive covers the intended bonding surfaces without creating large pools or obstructing the wedge slot. |
| 9 | Seat the Head | Drive the handle through the eye using controlled taps on the handle butt or a wood-protected striking surface. Keep the hoe head aligned with the grip. | Controlled seating reduces the risk of damaging the handle and helps maintain correct tool alignment. | The shoulder is firmly seated against the eye and the hoe blade is correctly oriented. |
| 10 | Install the Wedge | Drive the wooden wedge into the centered slot until it is tight and approximately flush with the handle top. Stop if the handle begins to split. | The wedge expands the handle inside the eye, creating a tight mechanical lock. | The head no longer rocks, and the wedge is secure without visible splitting around the slot. |
| 11 | Remove Excess Material | After the adhesive has set enough to prevent movement, trim the wedge and handle end close to the eye. Sand sharp edges smooth. | Smooth edges reduce hand injuries and prevent snagging during storage or use. | No sharp wood splinters or protruding wedge edges remain. |
| 12 | Cure Time | Keep the hoe stationary for the adhesive manufacturer's full cure period. For many water-resistant wood adhesives, practical cure time is commonly about 24 hours, but temperature and humidity can change it. | Handling the tool before full cure can weaken the bond and allow the head to loosen again. | The adhesive is fully cured according to its product instructions, with no soft or tacky areas. |
| 13 | Final Load Test | Before digging, hold the handle securely and apply moderate hand pressure in several directions. Do not begin with heavy impacts. | A gradual test can reveal remaining movement without immediately applying full working force. | There is no clicking, rocking, visible gap, or movement between the handle and hoe head. |
| 14 | Maintenance | Store the hoe in a dry, ventilated location. Inspect the head and handle before each use, especially after exposure to rain or prolonged damp conditions. | Moisture cycling can swell and shrink wood, gradually reducing the tightness of the joint. | The joint remains tight and the handle surface has no new cracks, soft spots, or splinters. |
After repairing a loose wooden handle on a garden hoe, test it before returning to hard soil. Wear gloves and keep your feet clear of the metal blade. Hold the handle firmly, then make several gentle strokes through loose earth. Watch for twisting, clicking, or movement near the head. A repaired hoe should feel solid, not perfectly rigid. Wood can settle slightly after fitting.
Increase the pressure gradually. Try shallow cuts, then deeper strokes in compacted soil. Stop immediately if the handle shifts or the wedge rises.
I once trusted a repair too quickly and loosened it again after striking a buried stone. That mistake showed me that testing must copy real garden work, not just a few movements in the air. Check the handle after ten minutes and again the next day.
Keep the wooden handle dry between uses. Wipe away soil and moisture, especially around the metal socket. Store the hoe under cover, with the blade supported and the handle off damp ground. Inspect it monthly for cracks, splinters, swelling, or a loose head. Lightly sand rough areas with fine abrasive paper, then apply a suitable wood preservative sparingly. Avoid soaking the handle, because trapped moisture can weaken the wood. Recheck the fastener before each season. My repairs last longer when I do this, although I still overlook small cracks sometimes.
The head may have a missing wedge, shallow seating, or an oversized metal opening. Moisture changes can also shrink and swell the wood. Small gaps matter.
Hold the hoe head firmly and move the handle sideways. Look for cracks, splits, crushed fibers, polished areas, and gaps beneath the head. Do not ignore shoulder cracks.
Hard impacts can compress the handle end and loosen the wedge. Remove the head and check whether the wood remains solid. A loose wedge is not always the only problem.
Replace it when the wood is deeply cracked, split near the shoulder, or badly crushed. Replacement is safer than adding adhesive to damaged wood. I once missed this warning.
The handle should sit straight and fit tightly inside the metal eye. It should resist firm hand pressure without clicking or shifting. Slight settling can occur.
Wear gloves and keep your feet away from the blade. Start with gentle strokes in loose soil, then try shallow cuts. Increase pressure gradually.
Stop immediately if the handle twists, clicks, shifts, or pushes the wedge upward. Recheck the fitting before using harder ground. Buried stones can expose weak repairs.
Wipe off soil and moisture after use, especially around the metal socket. Store the hoe under cover, with the blade supported and handle away from damp ground. Inspect it monthly.
Check for splinters, swelling, cracks, and head movement before each season. Lightly sand rough areas and apply a suitable preservative sparingly. Avoid soaking the handle. I still overlook small cracks sometimes.
Learning how to fix a loose wooden handle on a garden hoe begins with identifying why the handle has shifted, such as shrinkage, wear, or a damaged connection. Prepare basic tools and materials, including a hammer, wooden wedges, sandpaper, protective gloves, and suitable wood adhesive. Remove the loose handle carefully from the hoe head, then inspect both the eye of the metal head and the handle for cracks, rot, or excessive wear. Replace any unsafe parts before continuing.
To secure the handle, clean the connection, apply adhesive where appropriate, and refit the wooden shaft firmly into the hoe head. Drive a properly sized wooden wedge into the top of the handle to expand it inside the eye and improve stability. After the repair has set, test the hoe with gentle pressure before returning it to regular use. Regularly check for movement, keep the wooden handle dry, smooth rough areas, and reseal exposed wood when needed to extend its service life.

Moxie Garden