Soil pH affects how easily plants can access nutrients, so a simple check can help explain yellowing leaves or slow growth. It is not the only possible cause. Poor drainage, watering habits, and pests can create similar symptoms. How to test soil pH with simple tools is a useful skill for gardeners who want evidence before changing their soil. A reading can guide your next step, but it cannot diagnose every plant problem.
For a practical home test, gather soil from several spots in the same bed, remove stones and roots, then mix the sample. Use pH strips or a basic soil meter according to the product instructions; distilled water is often recommended for slurry tests. Small details matter. Avoid testing immediately after adding lime, compost, or fertilizer, since these can distort a reading. Vinegar and baking soda reactions may be familiar, but they are rough demonstrations, not dependable measurements. Read the result in good light, and repeat the test if it seems surprising. One handful can mislead. Keep a note of the date, location, and result, then compare it with the needs of the plants growing there. Home tools provide a useful estimate, though their accuracy varies with sampling and technique. It is easy to overread one number. If results remain puzzling, or a large planting depends on them, consider sending a sample to a reputable soil-testing laboratory.
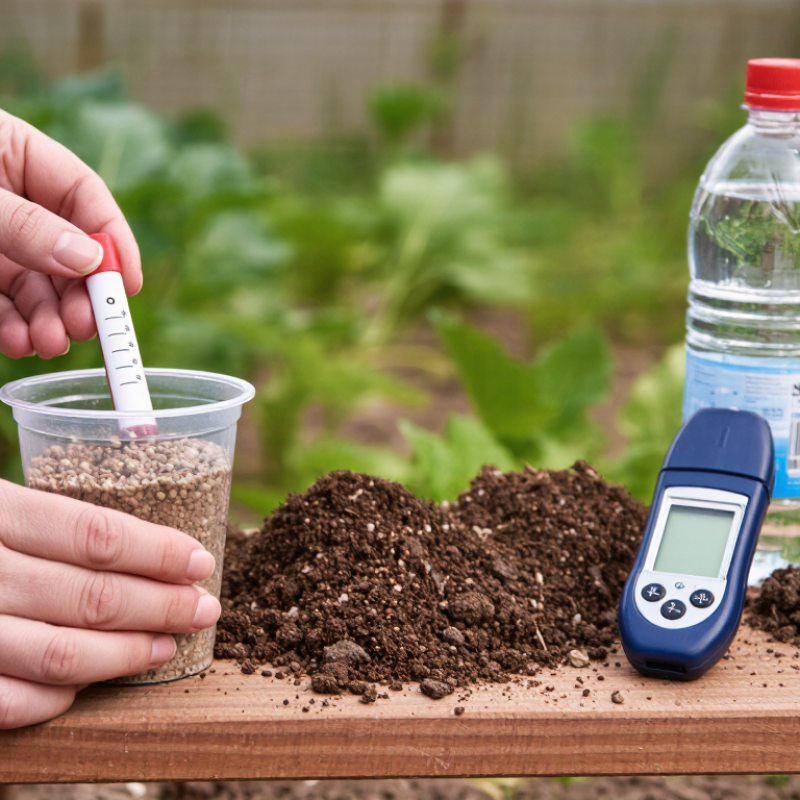
Soil pH measures how acidic or alkaline soil is, not how “strong” or fertile it feels. The USDA Natural Resources Conservation Service describes the scale as 0 to 14, with 7 neutral. Each pH unit represents a tenfold change in acidity. That is a big shift. A home kit or indicator strip can give a useful first reading, but muddy water and hard-to-match colors can make the result less certain.
Why does it matter? Soil pH changes how readily roots can access nutrients. Penn State Extension’s soil-acidity guidance notes that many nutrients are most available to plants around pH 6.0–7.0, though ideal levels vary by crop. Outside a plant’s preferred range, nutrients may be present but harder to absorb. That can mean pale leaves or slow growth, even when you have added fertilizer.
For a more dependable home check, take small samples from several spots, remove stones and roots, and mix the soil before testing. Follow the kit’s water and waiting-time instructions; tap water can affect some readings. Test again if the result seems surprising. I would not change the whole bed based on one strip: a laboratory soil test can also assess nutrients and recommend adjustments, which a basic pH kit cannot.
Gather a clean hand trowel, a plastic bucket, distilled water, and either pH test strips or a soil pH meter. Add a clean cup, a spoon, and labels if you are testing several garden beds. Avoid rusty tools or containers with fertilizer residue; even a small amount can affect your sample. Keep it clean.
Penn State Extension recommends collecting 10–15 soil cores from a lawn area and mixing them into one representative sample. For gardens, sample each distinct bed separately rather than combining soil with different histories.
Let the mixed soil dry on clean paper, then remove stones and roots. Follow the strip or meter instructions closely, including the specified soil-to-water ratio and waiting time. If using a meter, check whether it needs calibration; an uncalibrated reading can look precise but still be wrong.
Home tests are useful for screening, not a substitute for a laboratory analysis when results seem surprising.
Tips:
Use distilled water, label each sample, and test twice if readings differ. Small detail, big difference. Record the date and result; soil pH can shift, and a rushed sample is worth questioning.
A useful pH result starts with a representative sample. Choose one area with similar soil and growing conditions. Avoid spots beside compost piles, recently fertilized beds, paths, or downspouts. These can give a misleading reading. Use a clean trowel and collect small scoops from five to ten places. For a garden bed, sample roughly 4 to 6 inches deep, removing surface mulch first. Keep each scoop in a clean container.
Tips: Mix the scoops well. Remove stones, roots, and leaves. Let the soil air-dry on clean paper; don’t heat it, since heat may affect the sample. If one section looks or grows differently, test it separately instead of blending it in. It is tempting to gather just one handful, but that can reflect a single patch rather than the whole bed.
Follow the soil test kit’s directions for how much prepared soil to use. Some kits require a specific soil-to-water ratio, so don’t guess. If you plan to compare readings later, sample the same area and depth each time. Even careful sampling has limits: moisture, recent amendments, and uneven soil can shift results. A surprising reading may be worth checking with another sample.
You can check soil pH with a clean jar, distilled water, and pH test strips from a garden supply shop. Collect small samples from three or four spots in the bed, about four inches deep. Avoid fresh compost and visible fertilizer granules. Mix the samples in a bowl, then remove stones and roots. Place two spoonfuls of soil in the jar and add enough distilled water to make a loose slurry. Stir well and let it settle for about 15 minutes. Dip a strip into the clearer liquid and compare its color with the chart under good light.
No special strip? Try a rough kitchen check with vinegar and baking soda, but treat it as a clue, not a reading. Put dry soil in one cup and add vinegar. Fizzing may suggest alkaline soil. Put fresh soil in another cup, add distilled water, then a little baking soda. Fizzing may suggest acidic soil. Often, nothing happens. That does not prove the soil is neutral; these reactions can miss small pH differences. I once found the color chart harder to read in dim light, so daylight helps. Repeat the strip test with a second sample before changing the soil. A reliable number matters when choosing amendments.
A soil pH reading is a clue, not a verdict. On the pH scale, 7 is neutral; lower readings are acidic, and higher readings are alkaline. Many garden plants do well in slightly acidic soil, but preferences vary. Check the recommended range for the specific plants you want to grow before changing anything. A reading of 6.2, for example, may suit one bed but not every crop.
Simple meters and test strips can give slightly different results. Take small samples from several spots, remove stones and bits of root, and follow the tool’s directions closely. If readings vary, test again with a fresh sample. Read it twice. Avoid testing soil right after adding compost, lime, or fertilizer, since recent changes can skew the picture. It is tempting to treat one number as a verdict; that shortcut can lead to needless amendments.
If the pH is outside your plants’ preferred range, adjust gradually. Lime can raise pH, while elemental sulfur can lower it, but the right amount depends on soil type and the size of the area. Follow the product label or ask a local extension service for a soil-specific recommendation. Retest after several months, not a few days. Changes take time, and overcorrecting is an easy mistake to regret.
How to read the chart: These are typical target pH ranges, not universal rules. Check recommendations for your specific plant and local growing conditions. A pH below its target range is more acidic; a pH above it is more alkaline.
Test and plan: Collect small soil samples from several spots in the planting area, mix them, and follow your home test kit’s instructions. If the result is outside the target range, use a laboratory soil test or local extension guidance before making amendments. Lime can raise pH, while elemental sulfur can lower it; changes take time, so follow recommended rates and retest before adding more.
Choose an area with similar soil and growing conditions. Take small scoops from five to ten spots, about four to six inches deep. Remove surface mulch first. One handful is rarely enough.
Avoid areas beside compost piles, recently fertilized beds, paths, and downspouts. These spots may distort the reading. If one patch grows differently, test it separately.
Mix the scoops well, then remove stones, roots, and leaves. Let the soil air-dry on clean paper. Do not heat it. I used to rush this step; that was not helpful.
Yes. Mix soil with distilled water in a clean jar, let it settle for about 15 minutes, then dip a pH strip into the clearer liquid. Follow the kit’s directions for the soil-to-water ratio.
Compare its color with the chart under good light. Daylight helps. If the color looks unclear, repeat the test with another sample before changing the soil.
They can offer rough clues, not a reliable number. Fizzing with vinegar may suggest alkaline soil. Fizzing with baking soda may suggest acidic soil. No fizz proves very little.
The amount depends on the test directions. One simple method uses two spoonfuls of prepared soil, with enough distilled water to make a loose slurry. Don’t guess the ratio.
Moisture, recent amendments, and uneven soil can shift results. For comparisons, sample the same area and depth each time. A surprising result deserves another check. Even careful sampling has limits.
Soil pH indicates how acidic or alkaline the soil is, which can affect how readily plants access nutrients and how well they grow. How to test soil pH with simple tools at home begins with gathering basic household or garden supplies, such as a clean container, a small scoop, and a simple pH testing method. For a useful result, collect small amounts of soil from several spots in the area you want to check, remove stones and plant debris, and mix the soil into a representative sample.
Follow the chosen test method carefully, using clean materials and the recommended amount of water or testing solution if required. Compare the result with the test’s reading guide, then consider the pH needs of the plants you plan to grow. If the reading is outside their preferred range, make changes gradually and retest the soil before making further adjustments.

Moxie Garden