A small garden shed can become crowded faster than expected. One trowel becomes three, empty pots stack beside tangled hoses, and the floor slowly disappears. The National Gardening Association’s 2023 National Gardening Survey reported that roughly four in five U.S. households participated in gardening. More gardeners also mean more tools, supplies, and storage pressure at home.
So, what is the best way to organize a small garden shed? The answer begins with visibility, safe access, and honest measurement. The Garden Media Group’s 2024 Garden Trends Report highlights continued interest in practical, productive outdoor spaces. That trend makes compact storage more important, especially for gardeners working with limited yards or patios. A wall-mounted rail can hold hand tools. A narrow shelf can lift seed trays above the floor. Clear labels can prevent a frantic search before watering.
Measure twice.
Professional storage guidance consistently favors vertical use, weight-aware placement, and regular decluttering. Heavy soil bags belong low, while lightweight gloves and twine can sit overhead. Keep frequently used tools near the door, but do not block the entrance or ventilation. Store chemicals only according to their labels and manufacturer instructions. Never mix unknown substances. A small first-aid kit and stable lighting also deserve space.
Perfection is unrealistic. I have organized sheds that looked tidy for one weekend, then collapsed into disorder after a rainy month. That failure matters. The best system must survive muddy boots, wet hoses, and hurried gardening. These ten tips focus on practical layouts, durable storage choices, and simple routines that make a small shed easier to use every season.
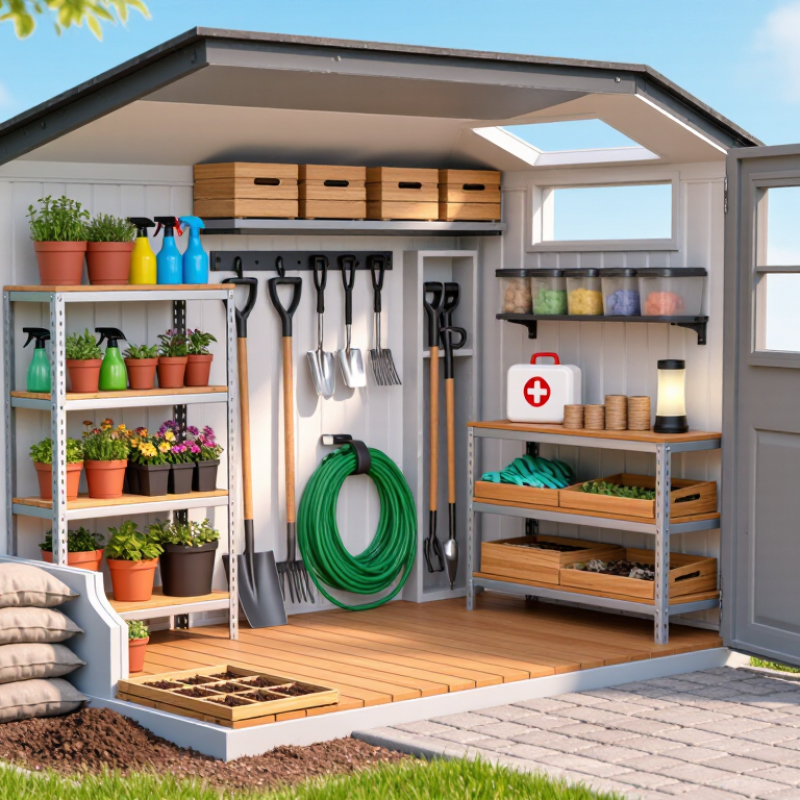
Before buying organizers, measure the shed’s usable space. Record wall height, door swing, window clearance, and the narrowest walkway. A 6-by-8-foot shed provides 48 square feet, but shelving, tools, and door movement quickly reduce it. The 2023 National Gardening Association industry report estimated that 77% of U.S. households participate in gardening. That level of use makes realistic storage planning essential, not optional.
List every item by frequency and size. Keep daily tools near the entrance, seasonal equipment higher, and heavy materials below waist level. Leave a clear path of at least 24 inches where possible. The U.S. Consumer Product Safety Commission recommends stable storage that prevents falling objects, especially in work areas. Use that principle for stacked pots, fertilizer containers, and long-handled tools. Never trust a crowded corner.
I once measured shelves but ignored the door arc. That mistake wasted valuable wall space. Sketch the open door on paper before fixing anything. Group tools by task, then count duplicates honestly. The 2024 Garden Media Trends Report highlights continued growth in home food gardening, which may increase demand for seed trays, hand tools, and soil storage. My own weak point is overestimating future needs. Keep some empty capacity, but do not reserve half the shed for imagined projects. A small transparent box for labels, twine, and spare fasteners can prevent repeated purchases and reduce clutter.
A small garden shed becomes difficult when every tool has a different home. Empty the entire shed onto a clean, dry surface. Check each item for rust, broken handles, or missing parts. Keep useful tools together, and set aside damaged items for repair or responsible disposal. Sweep the corners before returning anything. Dirt often hides leaks and insects.
Tip: Group tools by purpose. Place pruning shears, ties, and gloves near the planting supplies. Keep spades, forks, and trowels beside bags of soil. Store watering equipment near the door. This arrangement reduces unnecessary searching during busy gardening days. I once placed hand tools in three separate boxes. It seemed tidy, but it wasted time.
Tip: Arrange tools by frequency of use. Put daily items at waist height or on open hooks. Store seasonal equipment on higher shelves, but label every container clearly. Keep heavy tools low to prevent accidents. Leave a narrow walkway through the center. Measure shelf depth before buying storage units; I ignored this once, and the door stopped opening fully. A simple inventory list can prevent duplicate purchases. Review the shed every few months, because habits change and clutter quietly returns.
A small shed becomes easier to use when its walls carry the storage load. Measure the wall space before buying any rack or hook. Mark the locations of studs, then anchor heavy racks into solid framing. Wall racks work well for long-handled tools, folding chairs, and narrow garden boards. Keep frequently used items between waist and shoulder height. Keep it visible.
A pegboard adds flexible storage for hand trowels, gloves, shears, and measuring tools. Arrange hooks by task instead of by item size. Leave a small gap between tools, so damp air can circulate. Mounted hooks can hold hoses, baskets, and lightweight extension cords. Use hooks with suitable load ratings, and check them after several weeks. Labels help, but clear outlines often work better in a crowded shed.
I once placed a shovel rack too close to the doorway, and the handle blocked the entrance. Moving it only a few inches solved the problem. That mistake taught me to test walking paths before tightening every screw. Store sharp tools with blades facing inward or covered. Keep heavier objects low, even when vertical storage looks tempting. Inspect wall anchors after seasonal changes, especially in humid weather. A little empty wall space is useful; filling every gap can make the shed harder to maintain.
This planning chart compares the wall or ceiling surface used by ten practical storage modules. Each value is calculated from the module dimensions shown, helping you organize tools vertically while keeping the floor clear.
Arrange shelves by frequency, not appearance. Keep daily tools between waist and shoulder height. Heavy soil bags belong on the lowest shelf. This reduces lifting strain and prevents unstable stacks. Leave a narrow aisle from the door to the back wall. Measure it before installing anything. I once added a shelf too low, and every rake became awkward to remove.
Use clear bins for seeds, gloves, ties, and small repair items. Label each bin with large, simple words. Store sharp tools in a dedicated rack or secured wall holder. Their handles should face outward for safer grabbing. Keep chemicals and fertilizers sealed, upright, and away from children or pets. A dry, shaded shelf helps protect their contents. Check labels regularly, because old supplies can become confusing.
Divide the floor into zones. Reserve one corner for long tools, another for empty pots, and a third for active projects. Keep at least one floor area clear for turning safely. Use a shallow tray under muddy footwear or leaking containers. Add a battery light if the shed has dark corners. I prefer a quick monthly reset, although I sometimes postpone it too long. During that reset, return misplaced items, inspect shelf anchors, and remove broken tools. Leave frequently used equipment near the entrance. Seasonal items can move farther back. Clear access matters more than perfect appearance.
A small shed becomes easier to use when every storage area has a clear label. Mark shelves, bins, and hooks with plain names such as “Hand Tools,” “Twine,” or “Empty Pots.” Use labels that remain readable in dim light, and place them where you can see them without moving other items. I learned that “miscellaneous” is a tempting label, but it often hides clutter rather than organizing it.
Keep frequently used items at waist height. Store seasonal supplies higher up, and keep heavy bags on a low, stable shelf. A simple map taped inside the door can help, especially if several people use the shed. Leave a little space around each category. Packed shelves look efficient until you need one small trowel.
Make regular checkups part of your garden routine. Once a month, look for damp patches, loose hooks, rusty fasteners, and labels that have peeled away. After heavy rain or a windy day, check the roof and door for leaks or gaps. Remove dry leaves and soil from the floor before they collect in corners. It takes only a few minutes. Still, I sometimes skip it, and then spend longer finding a tool or fixing a small problem that was easy to miss. Keep a pencil and spare labels nearby so you can update the system as your gardening habits change.
| Tip | Organization Task | Suggested Storage Area or Label | Checkup or Safety Note |
|---|---|---|---|
| 1 | Remove everything, sort items into keep, repair, donate, and discard groups, then sweep the floor. | Start with clearly marked sorting zones: “Keep,” “Repair,” and “Remove.” | Check for dampness, pest activity, and damaged flooring before returning items. |
| 2 | Group tools and supplies by task, such as planting, pruning, watering, and repairs. | Label shelves or bins “Planting,” “Pruning,” “Watering,” and “Repairs.” | Review the groups at the start and end of the gardening season. |
| 3 | Use vertical space for frequently used hand tools and keep handles easy to reach. | Mark a wall-mounted rack “Hand Tools”; hang tools securely with sharp edges facing down or inward. | Monthly, tighten loose hooks and check that the rack is firmly attached. |
| 4 | Store small items such as plant ties, labels, and fasteners in divided containers. | Use drawer or box labels such as “Plant Ties,” “Garden Labels,” and “Fasteners.” | Keep small parts dry and check containers for cracks or missing lids. |
| 5 | Keep heavy pots, bags of soil, and watering cans on low, stable shelves. | Label the lower shelf “Heavy Items”; place frequently used supplies near the entrance. | Check shelves for sagging and keep the floor and doorway clear of trip hazards. |
| 6 | Store long-handled tools together so they do not block the doorway or fall over. | Use a stable corner rack labeled “Long-Handled Tools.” | After use, remove soil and moisture; inspect handles for cracks and loose heads. |
| 7 | Protect seeds and other moisture-sensitive supplies in sealed, clearly identified containers. | Label containers with contents and, where relevant, the purchase or packed date. | Check for condensation, damaged packets, or signs of insects during seasonal cleanups. |
| 8 | Keep fuels, pesticides, and other hazardous products in their original containers and away from children and pets. | Use a separate, secure area labeled “Garden Chemicals—Follow Product Instructions.” | Follow each product label for storage and disposal; never store chemicals near seeds or food. |
| 9 | Create a simple inventory so you can find supplies and avoid buying duplicates. | Post a list labeled “Shed Inventory” inside the door or keep it in a digital note. | Update the list whenever supplies are used, added, or discarded. |
| 10 | Set a recurring maintenance routine for cleaning, organizing, and checking the shed. | Post a checklist labeled “Monthly Shed Checkup.” | Check the roof, door, locks, ventilation, shelving, and signs of leaks or pests at least monthly. |
Empty the shed onto a clean, dry surface. Check tools for rust, broken handles, and missing parts. Sweep the corners, too.
Keep related items together. Store pruning shears, ties, and gloves near planting supplies. Place spades and trowels beside soil bags.
Put daily tools on open hooks or shelves between waist and shoulder height. Keep watering equipment near the door.
Place soil bags and other heavy items on the lowest shelf. Leave a narrow aisle so you can walk through safely.
Use clear bins for seeds, gloves, ties, and repair items. Add large, simple labels. Tiny labels are easy to miss.
Use a dedicated rack or secured wall holder. Face the handles outward for easier, safer grabbing.
Keep them sealed and upright on a dry, shaded shelf, away from children and pets. Check labels regularly.
Set aside corners for long tools, empty pots, and active projects. Keep one area clear for turning, and use a shallow tray for muddy footwear.
A quick monthly reset can help. Return misplaced items, check shelf anchors, and remove broken tools. I sometimes put this off.
Measure the aisle and shelf depth first. A poorly placed shelf can block the door or make rakes awkward to remove.
Organizing a small garden shed starts with understanding the space, the items you need to store, and the problems that make the shed difficult to use. Clear everything out, then group tools and supplies by purpose and how often you reach for them. This makes it easier to spot duplicates, decide what deserves the most accessible space, and plan storage that fits the shed rather than crowding it.
What is the best way to organize a small garden shed? Make use of the walls with racks, pegboards, and securely mounted hooks, while arranging shelves and bins so frequently used items are easy to reach. Keep a clear floor zone for safe movement and larger equipment, and label storage areas to make items simple to find and put away. Regular checkups help keep the layout tidy as your needs change.

Moxie Garden